Controller Overclocking
Update 11.5.25
(Program credit to: “LordOfMice” aka SweetLow)
Short Description of the Program and Battle Beaver’s Involvement
If someone pointed you to this page, have a treat on us!
Click below or use discount code: OVERCLOCK at checkout for a special discount on all Quick Picks, Custom Builds, Pre-Built, and Refurbished controllers!
The transition from console to PC + Controller for competitive titles has opened the door to several controller performance enhancements. One enhancement, popularized by professional Call of Duty players using PlayStation 4 controllers on PC, involves using SweetLow’s “LordOfMice hidsubf” custom drivers to overclock a controller from the standard 250Hz polling rate to 1000Hz. This project, in development and with patch notes dating back to 2005, has garnered community support across various uses.
However, with the increasing adoption of Windows 11, installing this tool has become more challenging due to the implementation of new security features in the OS. SweetLow mentioned the need for a company to get his drivers signed and authenticated to alleviate these issues. This is where Battle Beaver stepped in. The current version (11/5/25) includes kernel drivers that have been EV signed by Battle Beaver and then Attestation signed by Microsoft. Now, on Windows 11, disabling Secure Boot is no longer a requirement. We will continue to collaborate with SweetLow to further develop these drivers and make them as user-friendly as possible.
Currently tested and working on Playstation 4 and DualSense controllers. This program will not work on Xbox Series X, Xbox One, or Xbox Elite controllers at this time.
Some troubleshooting may be required depending on your PC configuration.


Initial Setup
If you have already gone through the initial setup please skip to Step 13 for the Normal Usage Quick Guide.
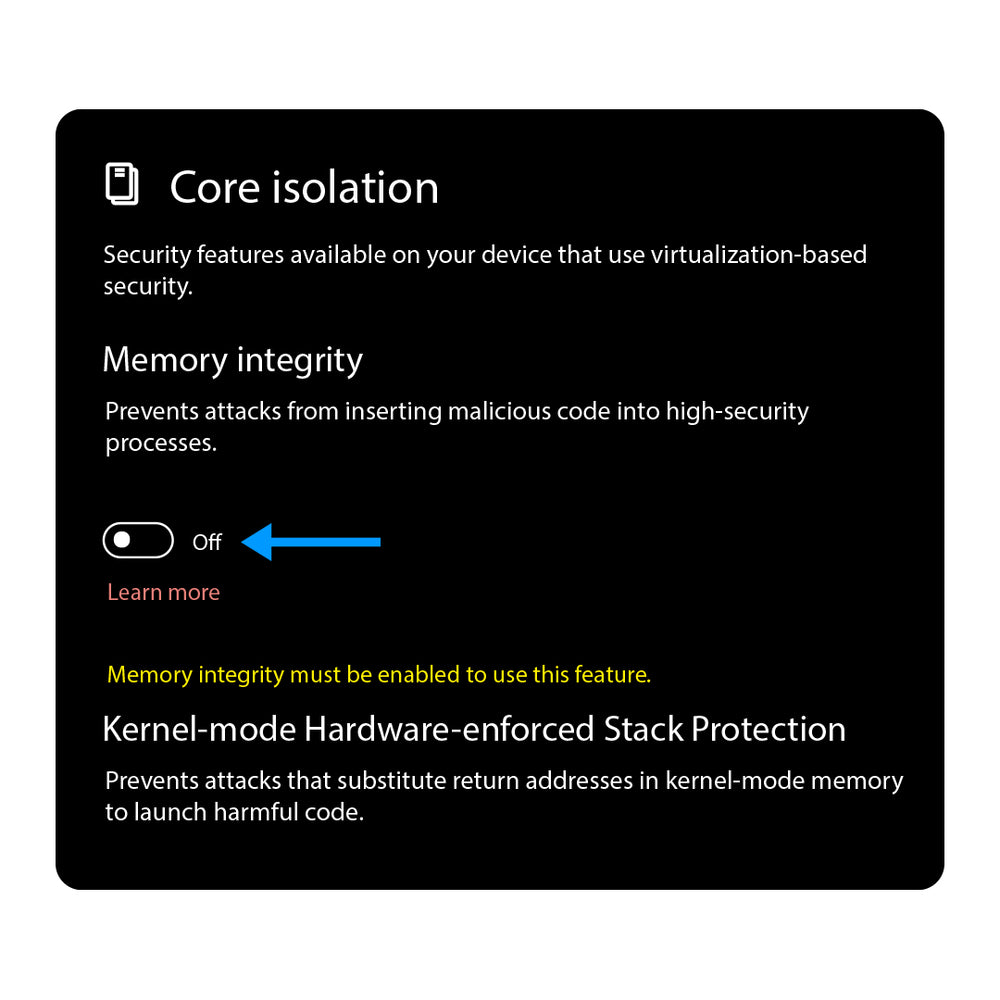
Turn Off Memory Integrity
Windows 11 users with the current version of the program will need to make sure the "Memory Integrity" setting is set to "Off" in the security settings. To access this option, search for "Core isolation" or find it under the Windows Security section. The first option in the window is "Memory Integrity."
Turn it off.

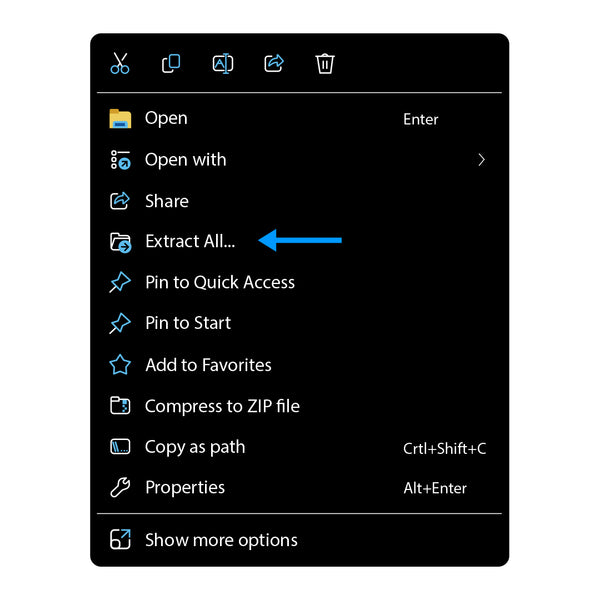
Unzip HIDUSBF
Download the program and extract the folder into a permanent location. This example uses the Desktop, but we recommend choosing a folder on the PC that you may not regularly delete, like the "Downloads" folder.

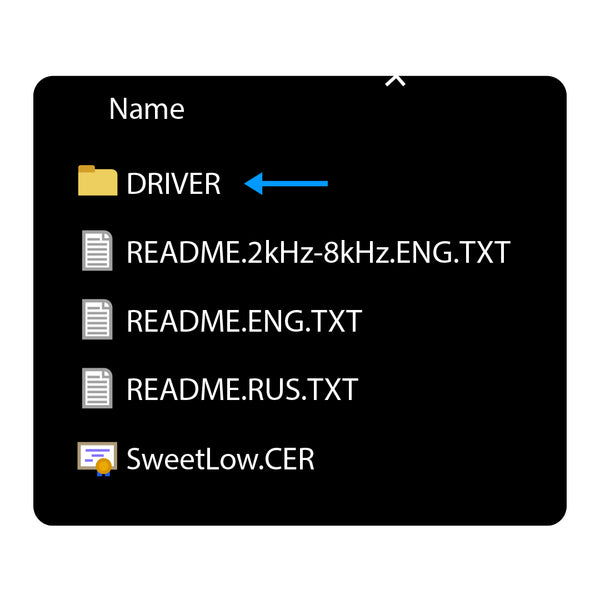
Open The DRIVER Folder
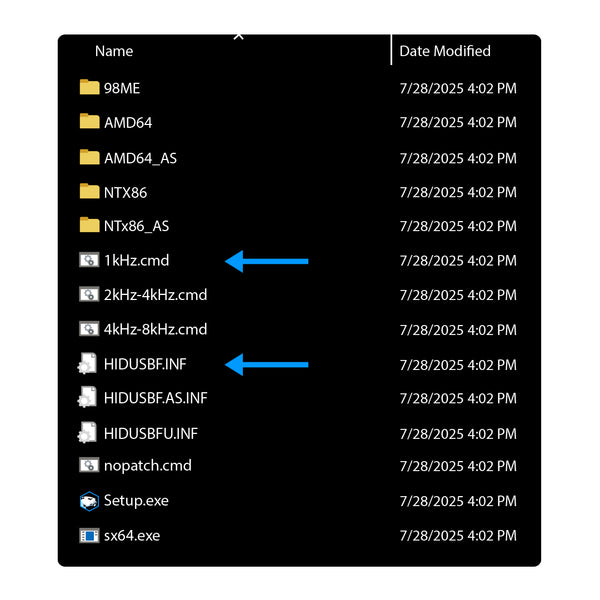
The folder contains a few README and other miscellaneous files. Ignore those for now, and open the "DRIVER" folder.

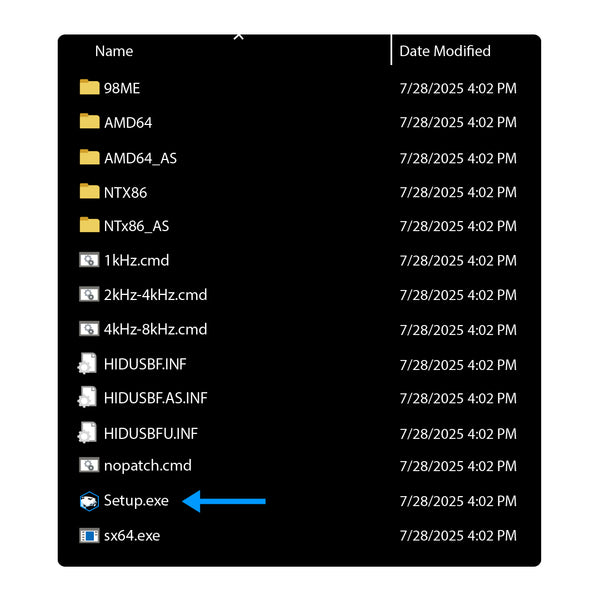
Open Setup
The "DRIVER" folder contains the program (Setup.exe), the drivers themselves, and the uninstall program. Open Setup.exe by double-clicking it.
Note: In some cases, you may need to right-click and select Run as Administrator instead.
A Windows prompt about an unknown publisher may appear. This is normal. Click through the prompts to open the program.

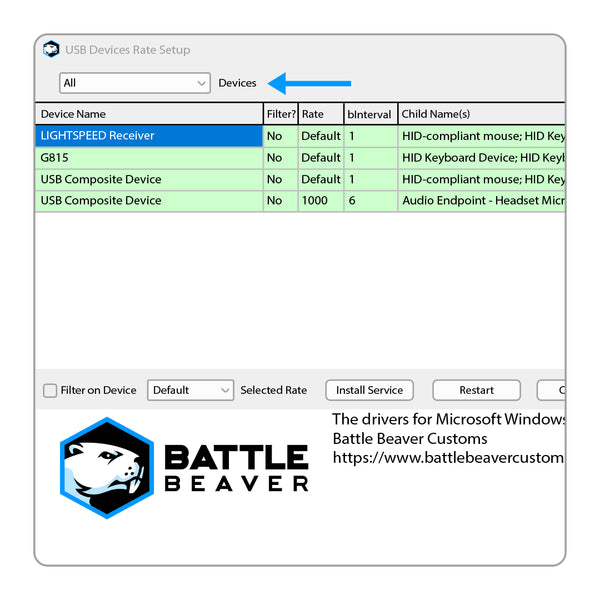
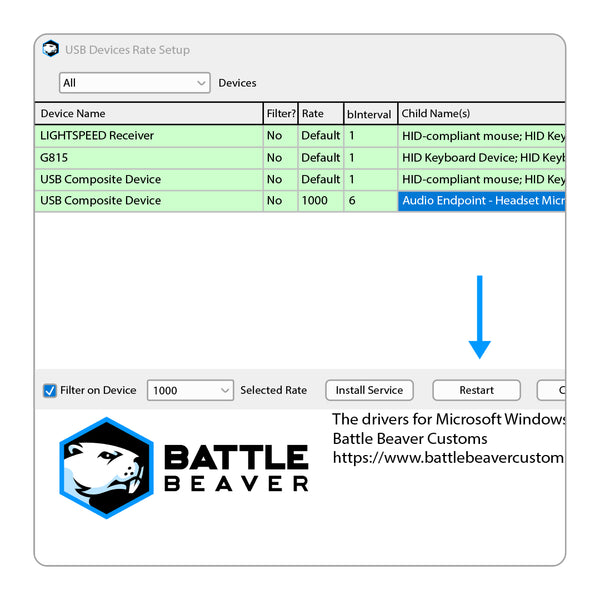
All Devices
After successfully opening the program, make sure the controller is connected to the PC. Navigate to the "Devices" dropdown menu at the top-left of the window, then select "All."
Find Your Controller
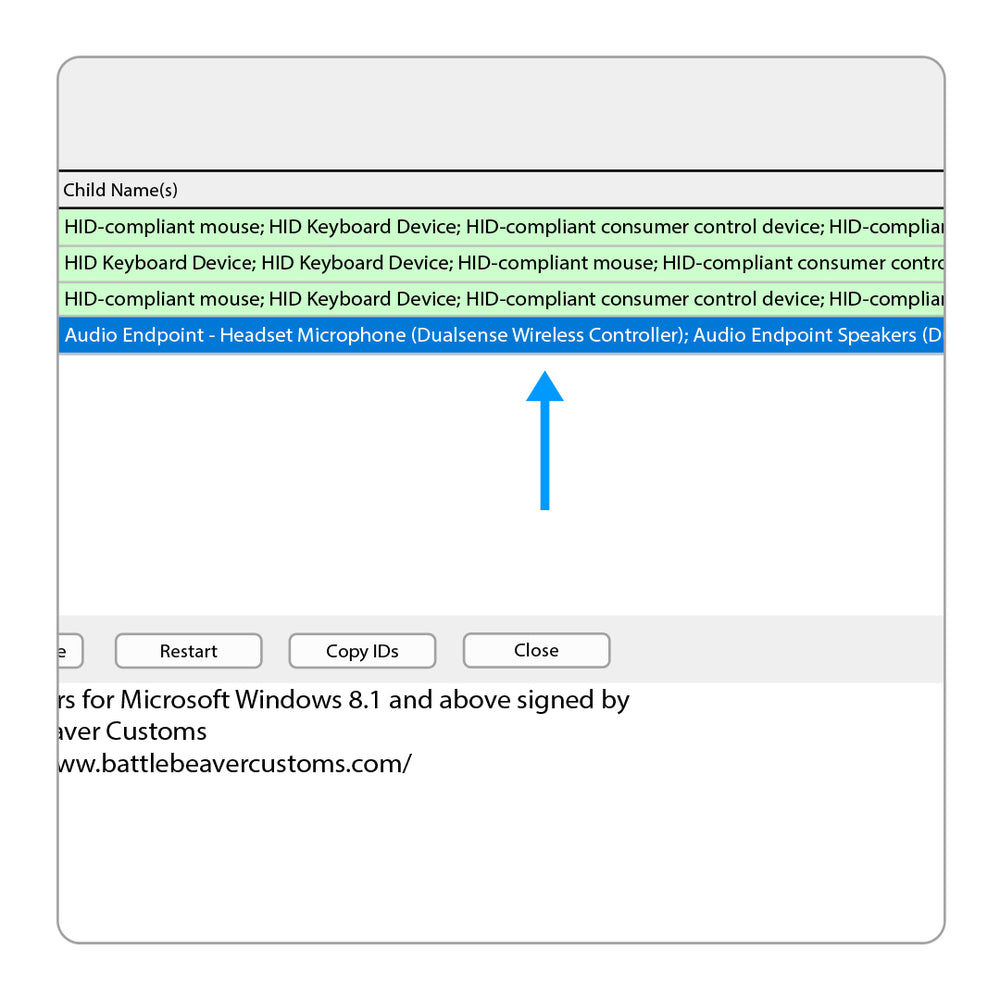
Look for your controller in the list of devices. Unfortunately, the "Device Name" column may not be helpful, especially if you have a lot of USB devices. Look at the "Child Name(s)" column instead. The names in this column can be a little tricky, but a few words in, you should see "Wireless Controller" included on one of the lines. That's your controller.
Click on that device. When selected, the highlight color should change.

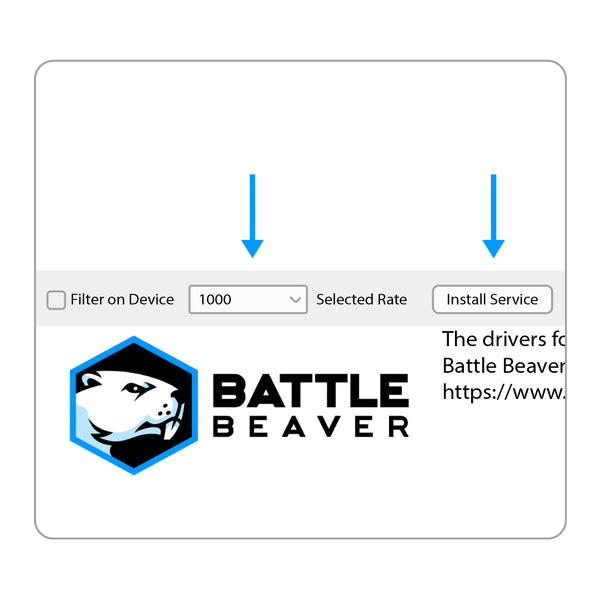
Select Rate
Next, find the "Selected Rate" drop-down menu at the bottom-left that currently reads "Default." Open the menu, select "1000," and click the "Install Service" button to finish.
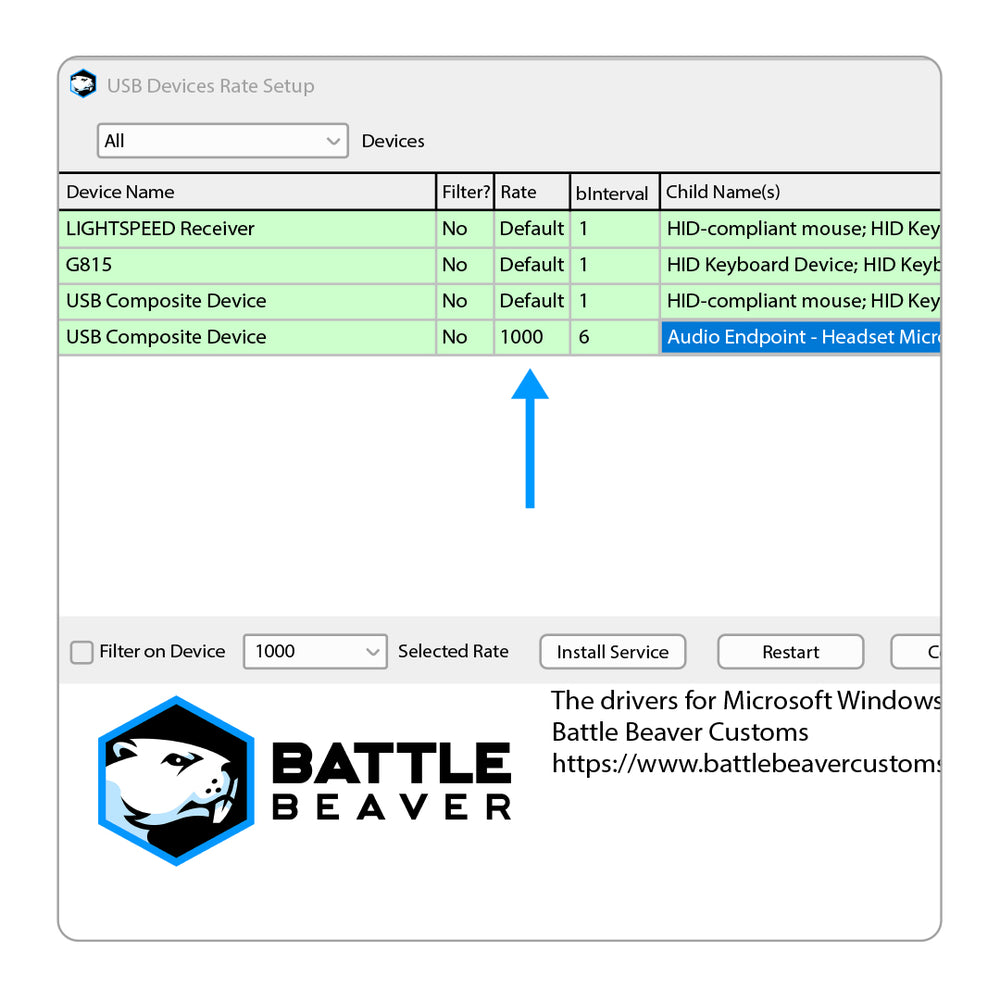
Success
If successful, you should see either a progress bar or a screen flash letting you know the program is flashing the driver. Once complete, the Polling Rate under the "Rate" column should now match your selection.

Common Installation Issues
During the first installation and use of the driver, it's crucial to look out for any errors. They would likely have appeared at this point of the process. If so, find answers to common installation errors on the GitHub Wiki by clicking the button below.
A common Windows 11 fix is to right-click the "HIDUSBF_AS" file, then click "Install" to manually load it for the first time. Try this also with the "1kHz.cmd" file by right-clicking it and choosing "Run as Administrator." Those two steps resolved any issues we had.
Create Desktop Shortcut
Optional Quality-of-Life Step
This guide is not necessary for functionality and may be skipped.
Find Setup.exe
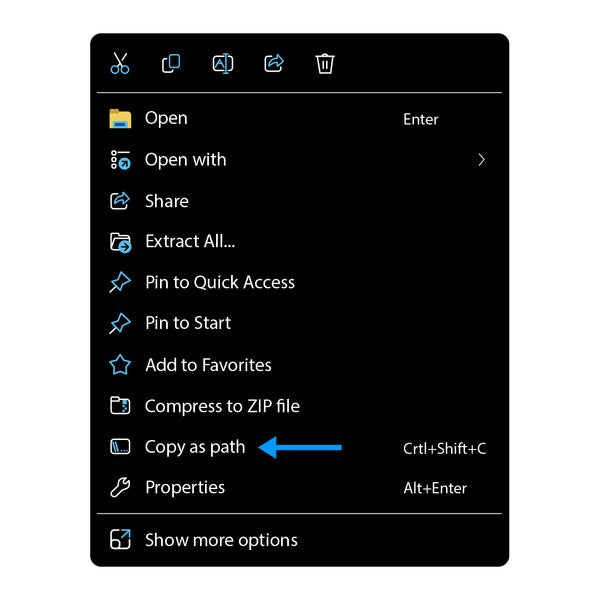
Return to the main "DRIVER" folder that you previously unzipped and saved in a secure location.
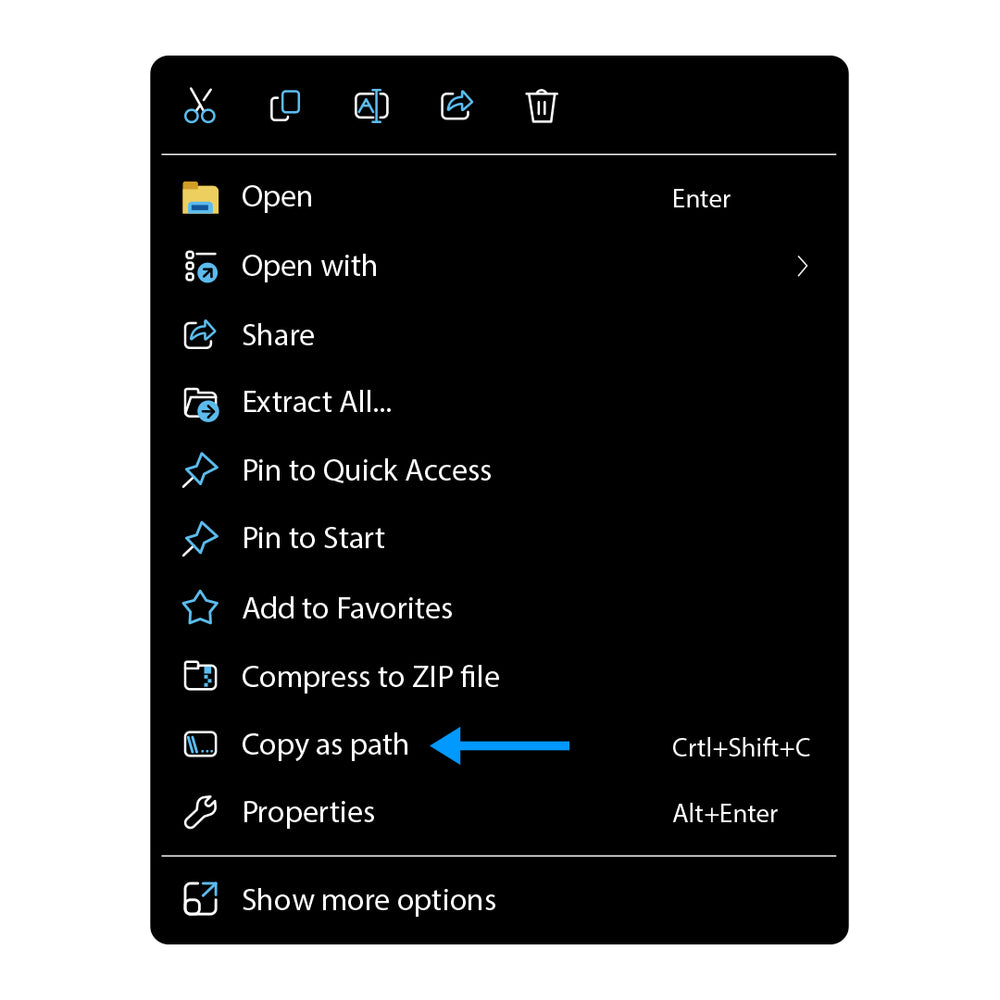
Instruction Step
Right-click "Setup.exe," then choose "Copy as path."

Create the Desktop Shortcut
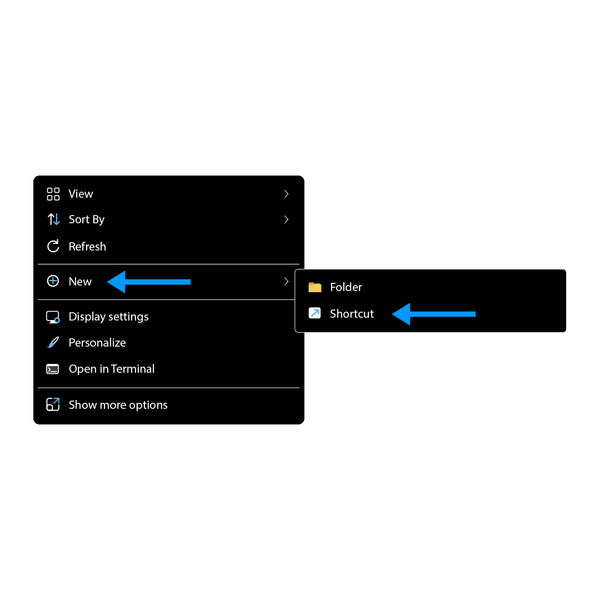
Go to your Desktop. Right-click and select "New," followed by "Shortcut."
Paste (CTRL+V or right-click and Paste) the file path copied in Step 2.
Click "Next" and give the shortcut a name. Click "Next" one final time to save the shortcut.
Normal Usage Quick Guide
Only proceed after completing the initial setup.
The steps are similar to the initial setup but with some minor tweaks.
Open Program
If the program is already open you may skip this step. If not:
Open the program (Setup.exe), either from the "DRIVER" folder or the desktop shortcut, if you made one.
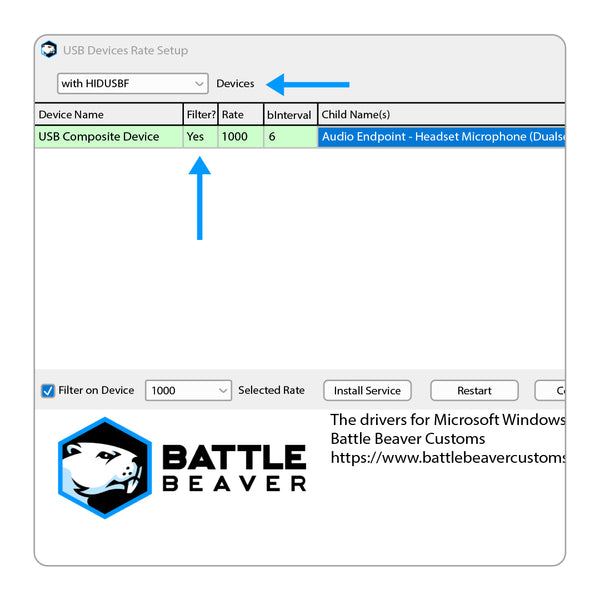
All Devices
Click the "Devices" drop-down at the top-left and select "All."
Select Your Controller
Find your controller in the device list and left-click it to select it.
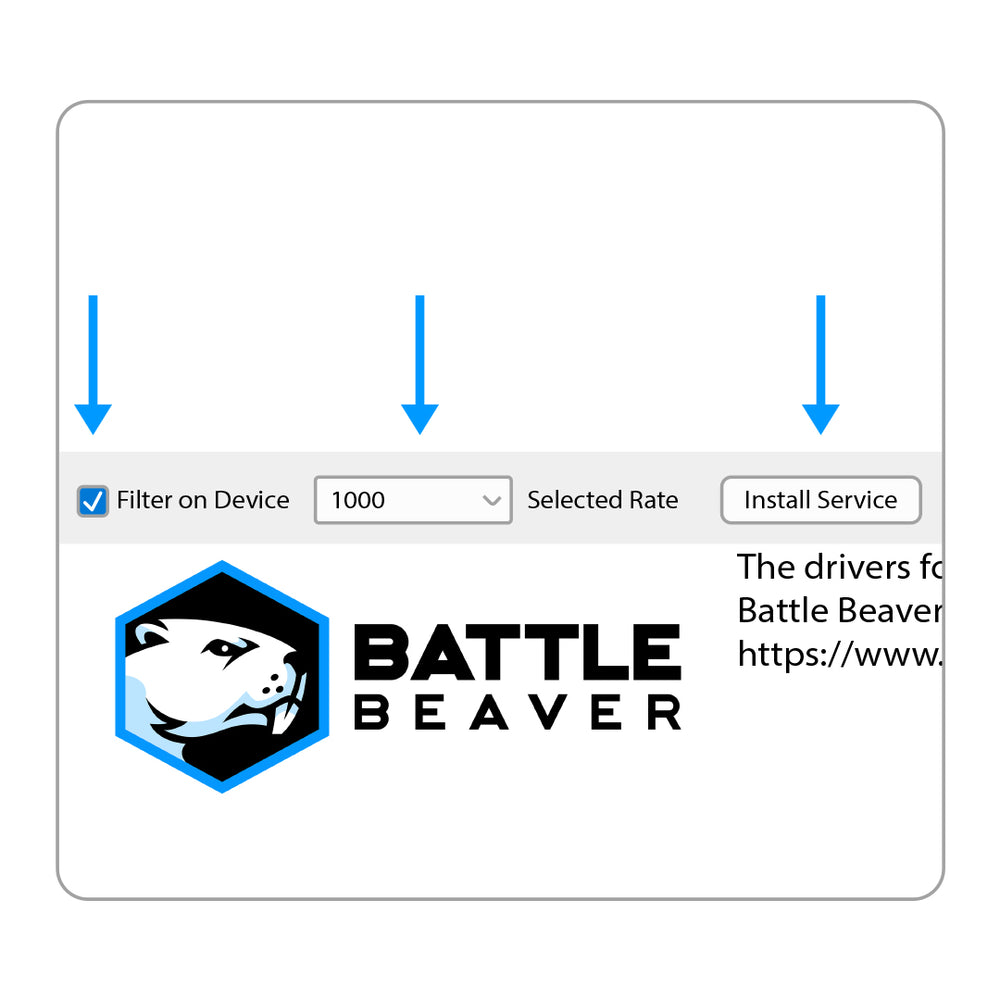
Filter & Install
Click the Checkbox next to "Filter on Device" at the bottom-left.
Select a new polling rate in the nearby "Selected Rate" drop-down menu. (1000Hz for PS4, and 1000-8000Hz for DualSense).
Click "Install Service."
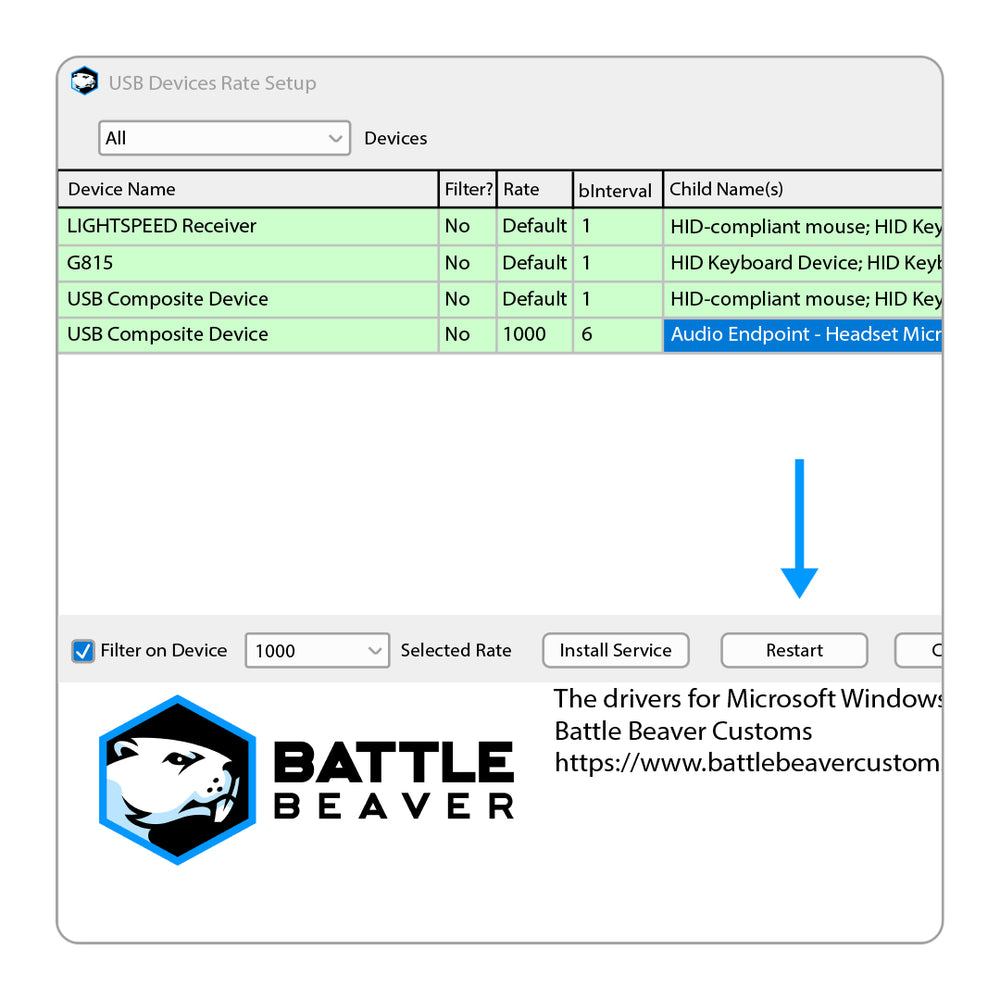
Restart the Controller
Click "Restart" to disconnect and reconnect the controller.
Sometimes, system errors may require physically unplugging and replugging the controller instead.

Final Checks
If the overclock was successful, the "Filter" column should say "Yes," and the "Rate" column should match the new rate you selected. You should be able to unplug and replug the controller, and the Filter/Rate columns should continue to show the flashed rate afterwards.
For a final verification, click the "Devices" drop-down at the top-left and select "with HIDUSBF."
Your controller should show on that list.
Errors
If your device is highlighted red, then the program failed to flash the polling rate. Try manually installing the HIDUSBF_AS driver, or visit the Wiki for troubleshooting suggestions based on the error code.
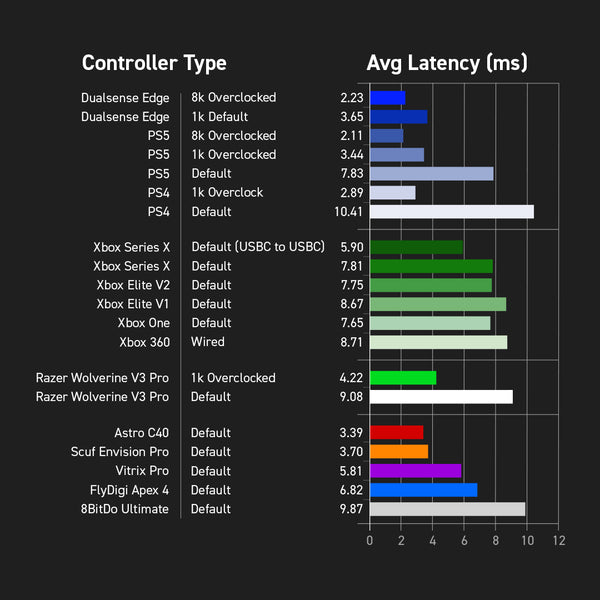

Average Latency Comparison by Controller
Using the Gamepadla GPDL (Linked Below):
- GPDL Device measures actual Latency vs theoretical based on polling rates.
- GPDL Fires a button press 2000 times and records the time it takes for the PC to register then averages those results.
Grab a controller pre-tuned for competitive play
Start with a controller already dialed in for pro performance, built to maximize your overclocking advantage


