The Phob GameCube Controller offers competitive players many settings and options at their fingertips, so we’ve made this webpage to help users understand what the PhobGCC can do. A real-time input viewer is strongly recommended to make changes accurately and with feedback. Use software such as Smashscope, GCC Test Suite, or UnclePunch on a Nintendo console for best results. PC solutions are available with an approved gcc adapter on the mainline Dolphin Emulator. Phobs may not work with most Mayflash gcc adapters, we suggest 1st party Nintendo, GC Pocket+, or Lossless Gamecube to USB adapters.
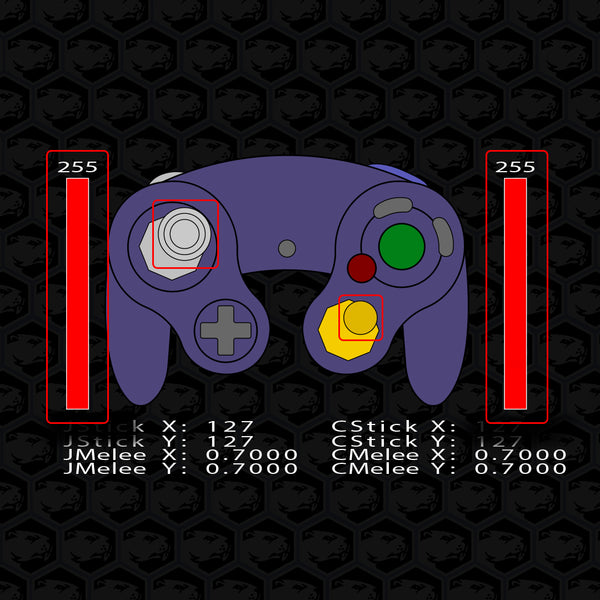
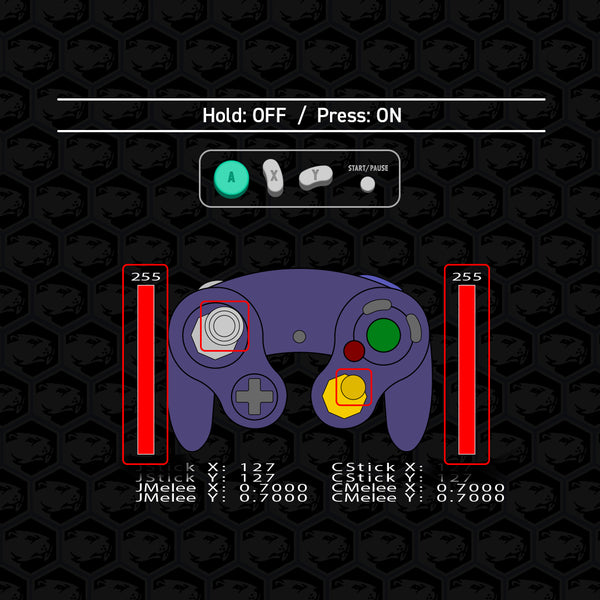
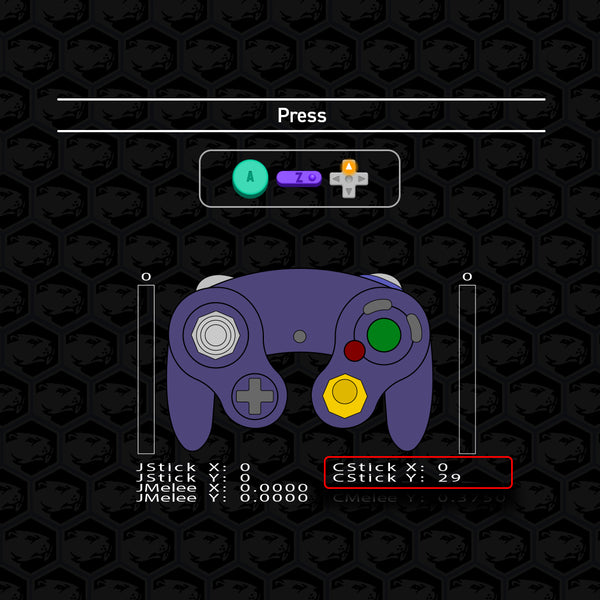
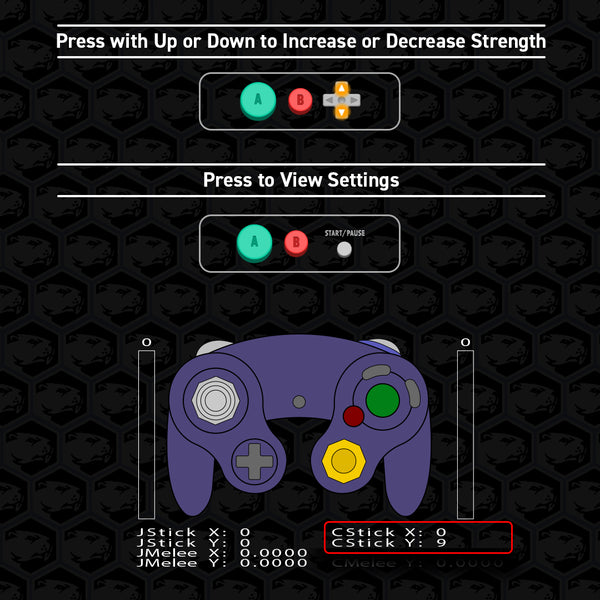
When inputting most commands, the controller will perform a Freeze Confirmation by freezing the controller with the sticks and triggers held for up to a few seconds. Some commands will have a Unique Freeze Confirmation with a corresponding numerical readout within the input viewer.
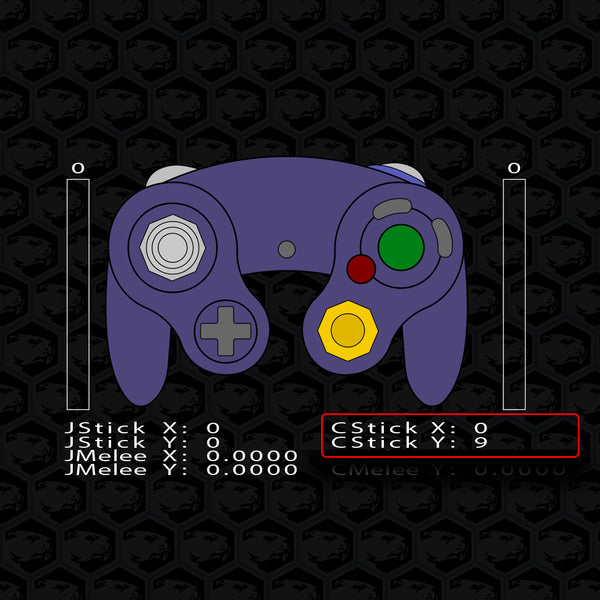
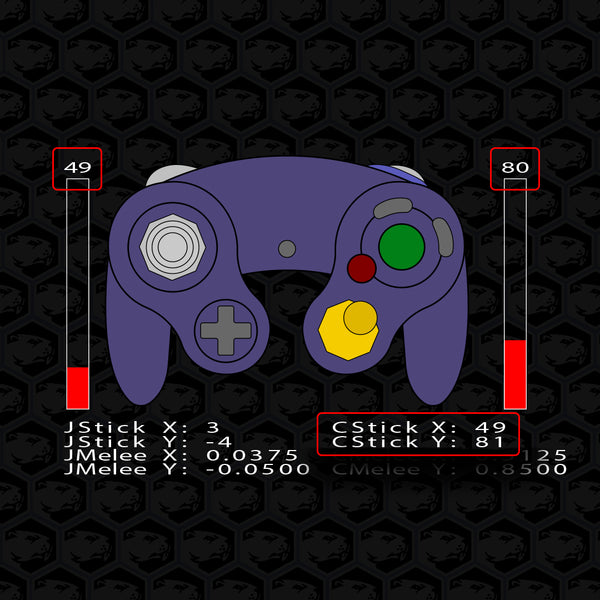
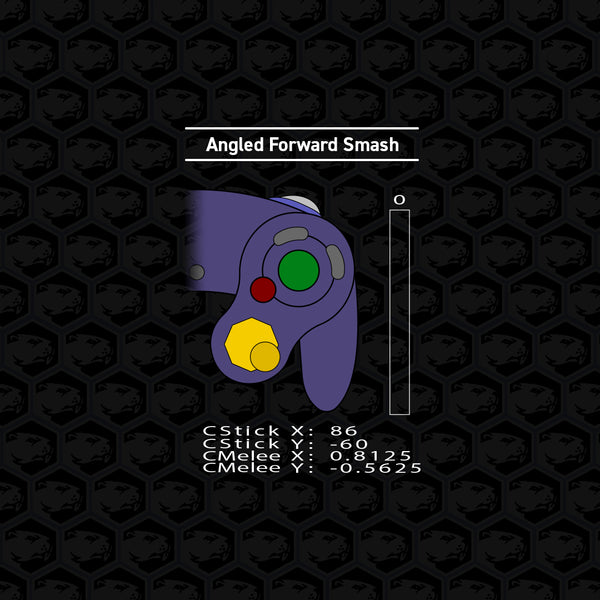
All examples shown are referenced from Smashscope:
Getting Started
By default, the controller will lock the analog sticks to center every time you plug in.
Press B to activate control of the analog sticks.
Safe Mode will always be ON when plugging in the controller.
Below, we’ll go over a few quick settings.

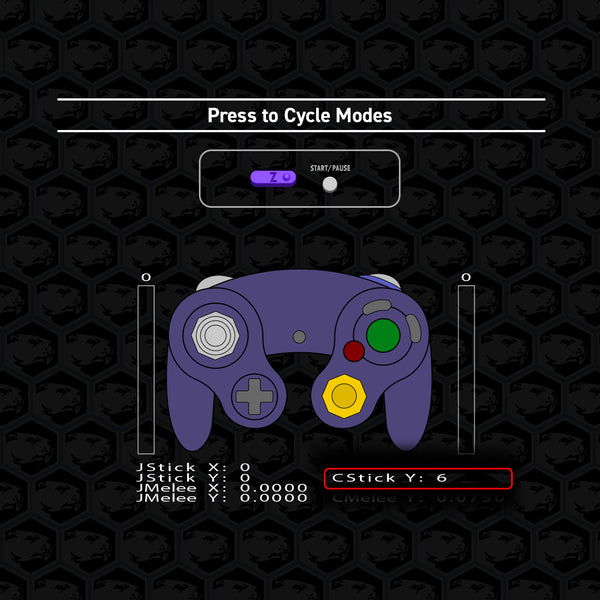
Trigger Configurations
The triggers on the gamecube controller are fairly customizable. By default, each trigger consists of both a slider (potentiometer) that registers analog values by how far down you pull the trigger and a separate contact press that registers a digital input at the bottom click.
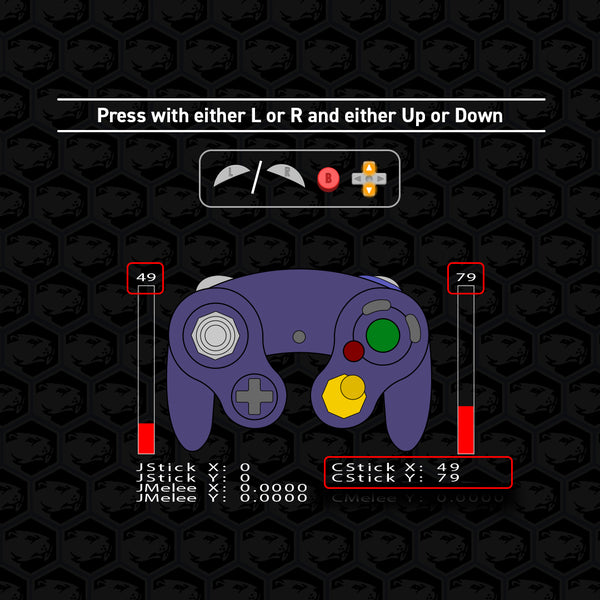
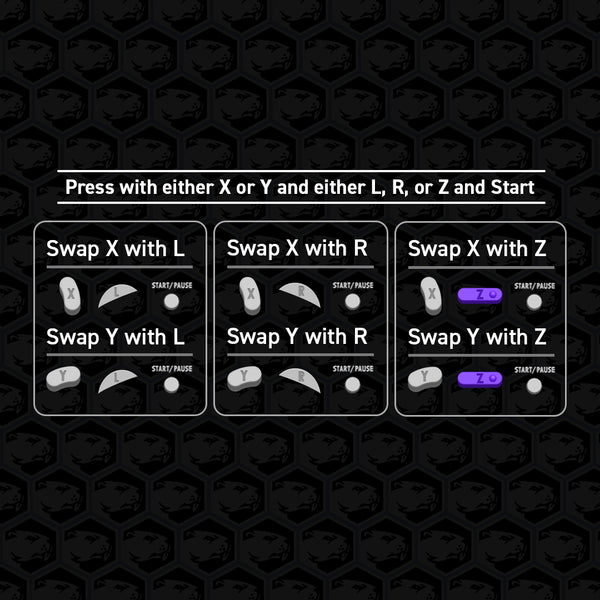
Users can cycle through 7 different modes as well as button swap remappings to find a combination that best fits their playstyle. Users can also define a set analog value for use in modes 4 through 7. The default is set to 49. See Set Analog Trigger Value Adjustment further below for more information.

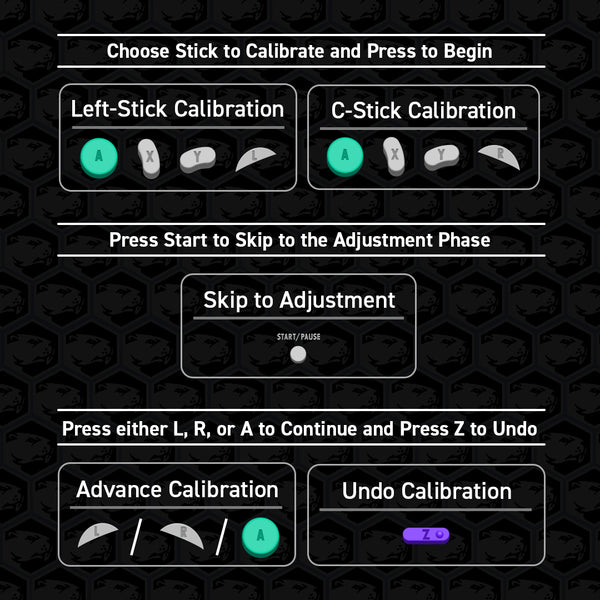
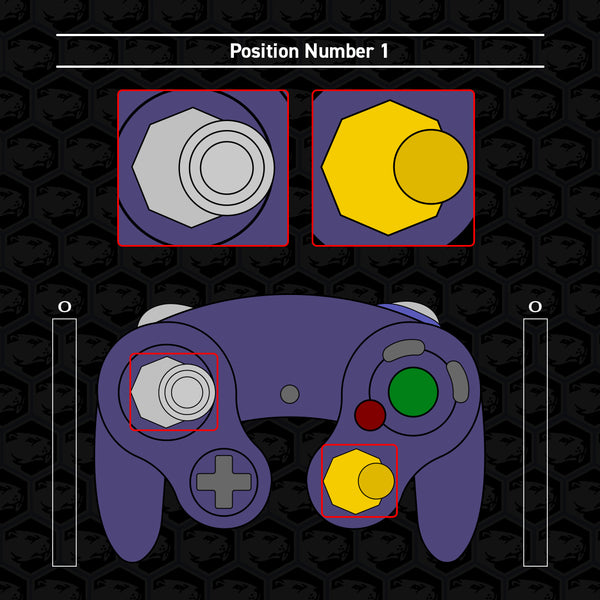
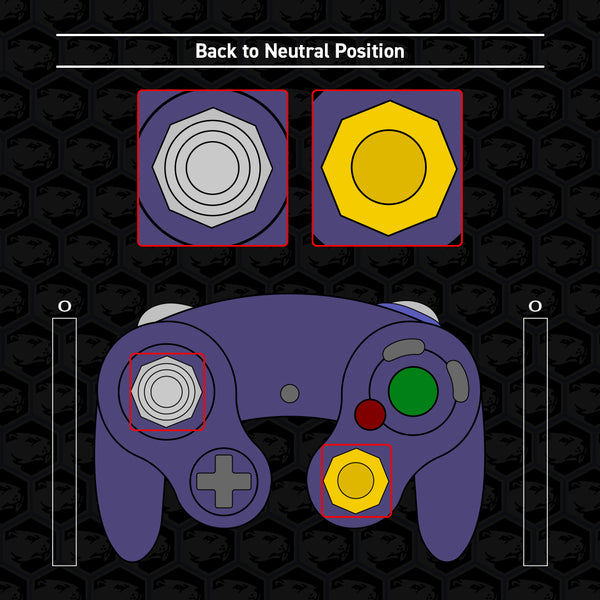
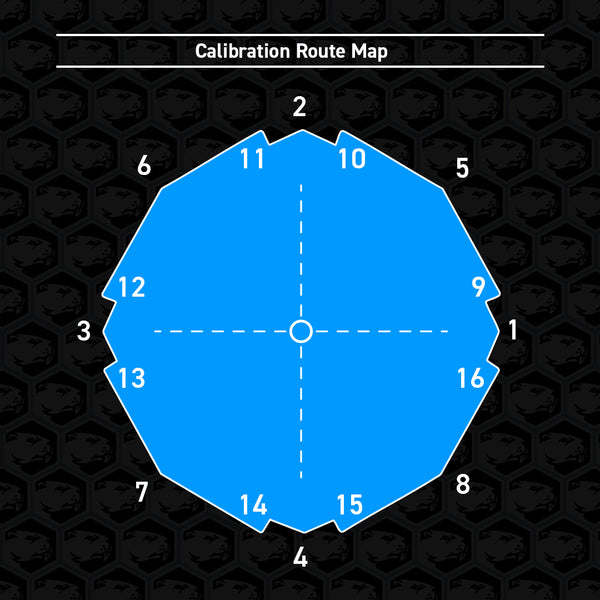
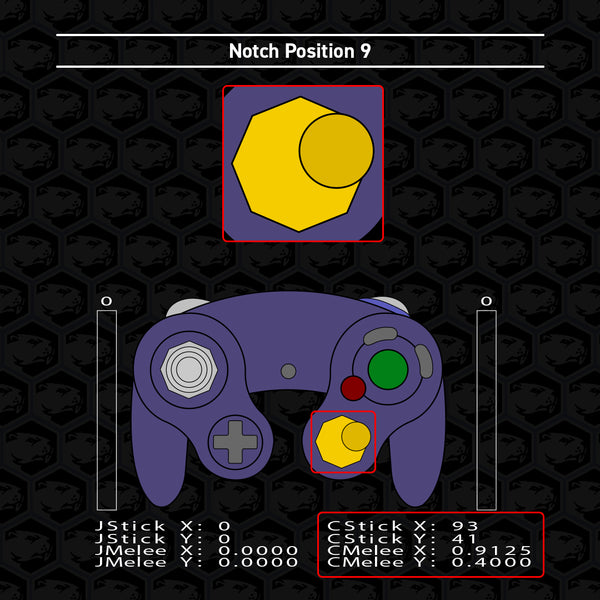
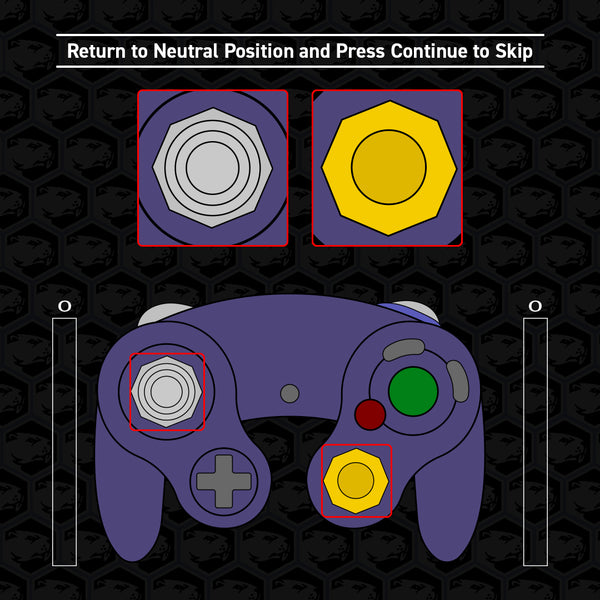
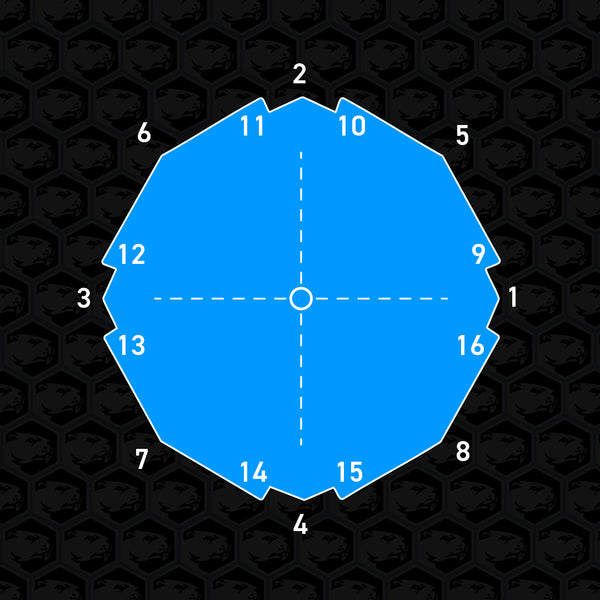
Analog Stick Calibration Steps
Users can calibrate the analog sticks for an accurate measurement of the control stick gates for their specific controller. Below we will go over how to complete the process while referring to the input display for guidance. If your Phob controller was received fully built and works fine, it may not be necessary.
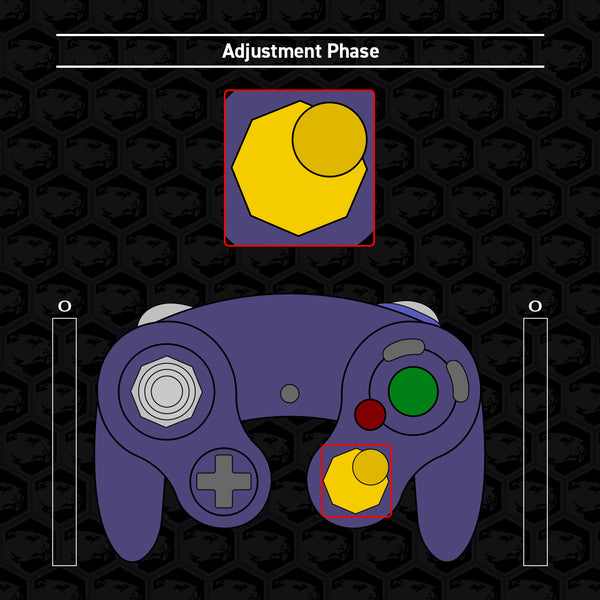
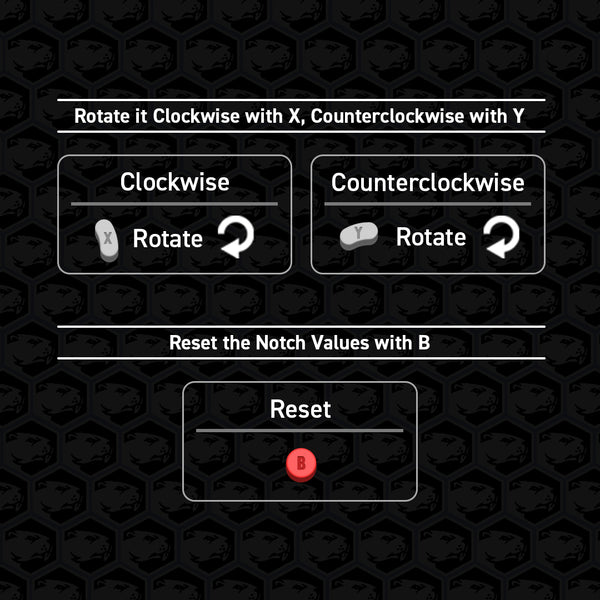
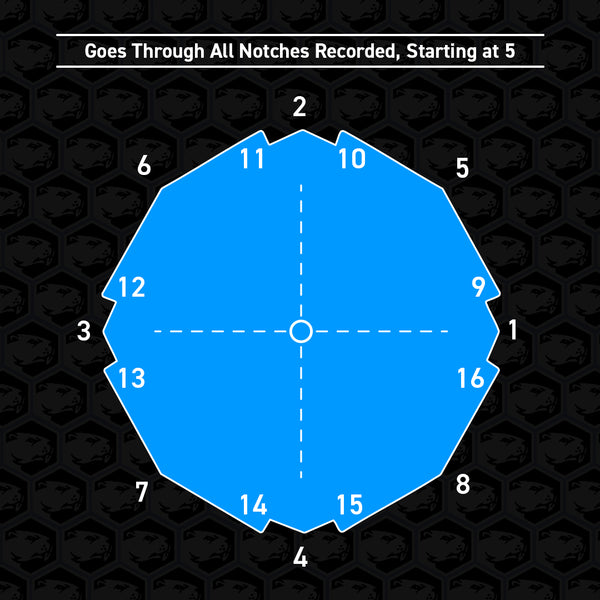
This process has a measurement phase to record the physical position of the notches (Steps 1-6) and an adjustment phase to further fine tune coordinate values (Steps 7-9).
To begin, choose a stick to calibrate and follow the instructions below.

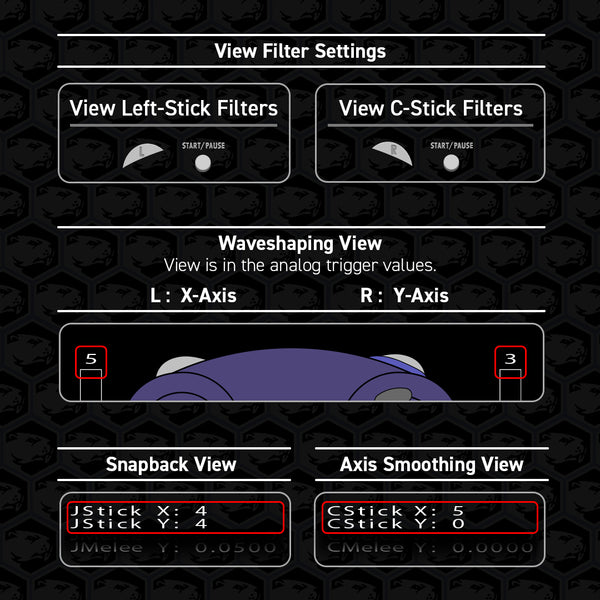
Analog Stick Filters
These filters allow advanced users to further fine tune the responsiveness and behavior of their analog sticks. We do not recommend adjusting these filters without an input viewer. Most users may not need to modify these filters if the controller is behaving as intended. Below we will explain what each filter does and how to adjust them. Most filters can be applied to the X-axis and Y-axis.